My Cart: 0 item(s)

Painting Tutorial
DIY Guide to Finishing your JcrOffroad Product.
After pulling the trigger on your JCR product, you now have to figure out how you plan to finish it. There are several options available commercially; bedliners, powder-coating or automotive Finishes. Plus many DIY options, including the rattle can paint & bedliner.
Which is best for me?
The finish you consider depends on how you plan to use your product. If it’s a daily driver, or show piece of your personality, you may want to opt for a professional finish. However, if you plan to use the product offroading, you may want to consider a cheaper solution that allows for you to touch it up if the product gets scratched or banged up.
DIY Options:
DIY bedliners – Not all DIY bedliners are created equal. Many of these products don’t have a good UV protection. This will cause the product to eventually become chalky looking, pitted, and in some cases crack. We strongly recommend doing a far amount of research before choosing a brand. Our opinion would be to avoid Herculiner at ALL COSTS!
POR15 – If you have done any searching for DIY finishes, you have probably stumbled across this product. POR15 is an extremely durable paint that uses a hardener to make for a great durable finish. This product can be brushed on or sprayed using a paint gun. The big downsides to POR15 are the steps involved, cost and availability. It will be something you will most likely have to order online and runs around $50 a quart. The process inlvolves a metel ready, the finish, and a UV topcoat. So it's quite involved.
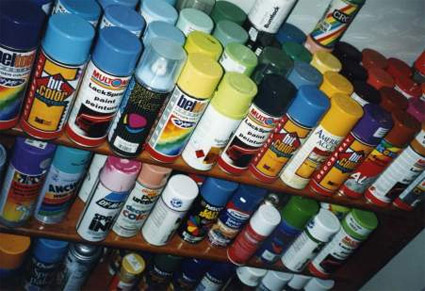
Rattle Can – This is the route most of customers go. You have many brand options, color options and it’s readily available; every hardware store carries spray paint in rattle cans.
Perhaps this is the first time you have entertained the idea of painting something yourself, or maybe you are just looking for some advice. Either way, we believe this little “How-To” guide will give you the confidence to tackle finishing your JCR product yourself!
 Picking a paint and primer:
The paint isle at your local store can be downright overwhelming! There are so many different brands, finish types and pricing. It can be tough to know what would work best and without trying some paints, you won’t ever know what would work best.
When we rattle can stuff, we always choose Rustoleum paints. The price is more toward the higher side of paints available, but the coverage is always better and the cans last longer. We basically have narrowed our paint choices down to three paints; Satin Black, Textured Black, or Hammertone Black.
If you are using something for the first time, it is best to paint a test piece before putting the paint on the product. If the paint has a texture to it, there is no going back, unless you want to have the paint sand blasted off.
Satin Black – a very mellow black that blends great with most factory frame paint.
Textured Black – A textured paint that gives a rugged look and good durability.
Hammertone Black – It’s more of a dark charcoal color, but the Hammertone paint covers easy and can take a beating.
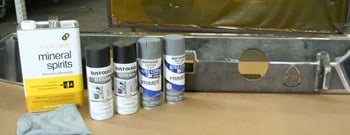
For primer, we also go with Rustoleum.
Some choose to go with self-etching primer, but prepare to spend $10-12 per can. Self etching paint chemically etches the metal surface for better adhesion. It's usually followed up by a coat or two of epoxy primer, than your desired top coat. It provides a more durable base and is usually available at your local auto parts, or automotive paint supplier.
Self etching primer fumes are more dangerous than regular spray paint, so be sure to work in a well ventalated area with a mask and eye protection made for chemical fumes.
Prepping the Product for Paint:
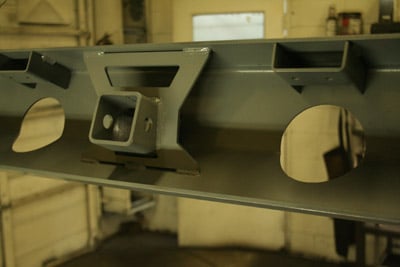
We do our best to ship a clean product, however we highly recommend a good cleaning before starting your painting. The cleaner the base, the better the final finish.
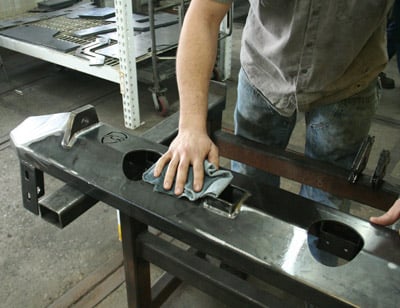
1.) Optional - scuff the whole product with 120 or so grit sand paper to remove all scale and to promote better paint adhesion.
2.) Optional - some small surface and weld scrapes, scuffs, and pin holes are unavoidable. If your looking for a professional looking finish, spending the time to sand these scuffs out, or to fill with a metal filler (and then sand) would be time well spent.
3.) Using mineral spirits on a rag, wipe down the entire product. Be sure cover as much as you can, including any nooks and crannies.
4.) Now take a dry rag and wipe down the entire product a second time.
5.) After the product has dried, look it over to make sure you have removed all residues.
6.) Optional - Your local hardware store (or automotive paint store) sells tack cloths for paint prepping. This is a cheap, sticky coated cloth that will remove all dust and fuzz from your ready-to-paint part. It's a good idea, cheap, and reusable for all sorts of painting/staining.
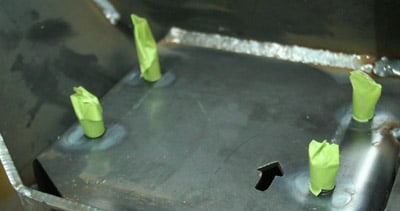
4.) If there are any exposed mounting threads, you will need to mask these off before painting.
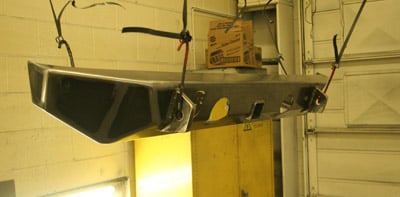
5.) Ideally, you will want to hang the product up to make painting it easier. If this is not an option, you can also prop the product up with milk crates, buckets or cinder blocks.
Before you begin painting, make sure you have proper ventilation and use a respirator or a breathing mask of some sort.
Priming:
6.) A good finish starts with a good priming job. Using long even stokes, LIGHTLY put on a first coat. You literally will be partly coating the product with this first coat. Allow the coating to dry (roughly 10-15 minutes). 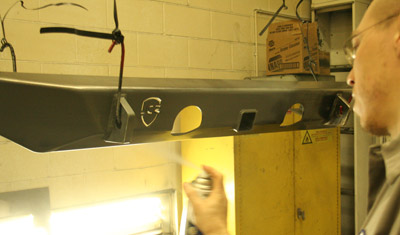
7.) Next you will be putting on a more even and complete second coat. You will want to cover the entire product at this point. Allow the second coat to dry (roughly 15-20 minutes).
8.) Once the second coat has lightly dried, you will be putting on the final coat of primer. Using long even strokes recoat the entire product. Leave the product hanging and allow for the primer to completely dry. This can take as little as 2 hours and as much as overnight. Refer to the instructions on your primer can for optimum drying and conditions.
When the primer is completely dry, you can handle the product again.
If you accidently put the primer on too heavy in certain spots, this would be your opportunity to sand the runs.
If you accidently put the primer on too heavy in certain spots, this would be your opportunity to sand the runs.
Painting:
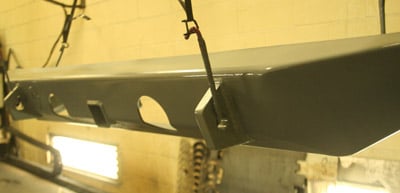
9.) Use the same technique to paint the product as show in steps 6-8. The key is to take your time and not put the paint on too heavy, using a three coat system just like the primer. The first coat should be so light, that you can see most of the primer through the light first coat. For the second and third coats, go for even and completely coverage.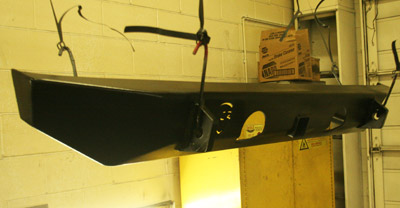
Leave the product hanging and allow for the paint to completely dry. This can take as little as 2 hours and as much as overnight. Refer to the instructions on your paint can for optimum drying and conditions.
